I recently had an MRI and wanted to make an animated GIF out of the images. I found a couple of great little programs that made this task a breeze.
To make an animated GIF of your MRI, we’ll first want to strip off your name and personal info from each of the images. This makes the resulting images look cooler. This step is optional, but highly recommended as your personal info will stay private, but you’ll end up with a wicked set of images.
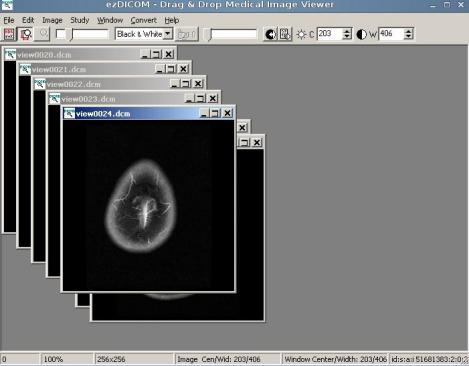
Open your CD, navigate to “Data.” Within this folder you should see one or more folders with a name like EXP000**. These are where the actual views are stored. They should each contain some .jpg files, some HTML files and some .dcm files. We are interested in the .dcm files; they are called DICOM images. We need some software that can view and edit and convert DICOM images. A great free medical viewing program is called ezDICOM. This same website has details on the format as well as suggestions for many other editors, but I won’t cover any of those.
I’m running ezDICOM in Linux under WINE for this tutorial.
Make sure you are viewing thumbnails in your folder (View–>Thumbnails). Look at the .jpg files to see which ones are from the same series of images. Sometimes many different views are mixed together in these folders. You may want to create a folder on your desktop to organize files that are from the same view. You can also run the program that came with the CD to see which views are from the same series.
In ezDICOM, go to File–> Open and hold the shift key as you select all the correct DICOM images.
From here you can edit the size and contrast of the images if you choose. The main point is to eliminate any data or text on the images in preparation of the next step. From here I usually save all the files as images to a separate folder. Do this by hitting “Ctrl+s” then selecting .jpeg as the filetype. Name the file what number in the series it is using the name of the DICOM it came from. Be sure to name the first 9 images with a leading 0 as in 01, 02,03, etc. This helps keep the images in the correct order later on.
I ran through 24 images very quickly using this approach. Additionally, there is a standalone DICOM to jpeg converter in the ezDICOM package called “dcm2jpg.exe” This is a command line program that says you simply have to drag and drop .dcm files on top of it and it’ll convert them to jpeg for you. This can likely do batches of files and speed up your process, but since I only had 24 images I was interested in here, I did it manually.
The next step is to get the images into a GIF animation.
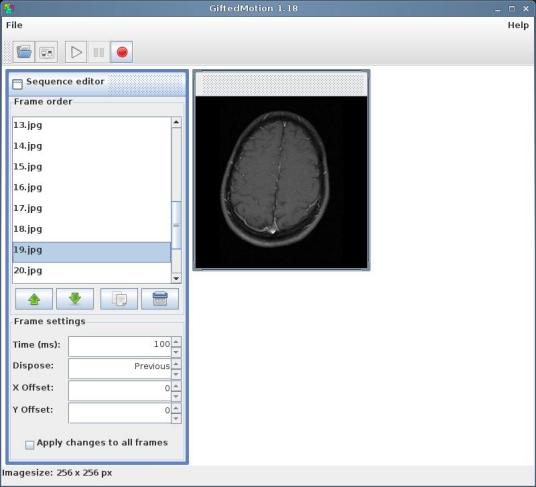
For this I used a program called GiftedMotion. This dead simple JAVA program allows you to easily make animated GIF images on any platform. Simply go to File–>Load and Shift-select the .jpeg images you just made. Once all the images are loaded, you can hit the “Play” button to see what the GIF will look like. If things are out of order you can use the arrow buttons in the Sequence editor to move stuff around. You can also play with the length of time each frame is shown and move them around somewhat.
When you are happy with the results, hit the “Record” button to save the resulting GIF. It will take some time, and the larger your images are and the higher the number you have, the longer it will take, but the results are a wicked animated GIF of your brain scan.


