 A good friend of mine celebrated his birthday recently, and I wanted to make him somethingon a CNC machine as a gift. My friend brews beer and is an avid cyclist. In fact, his beer is on tap at the local bike shop. I Figured the best gift would be a customized bottle opener with a few symbols of his interest engraved into the handle.
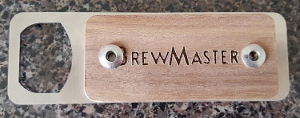
First, I ordered the Bottle Opener kit from Inventables.com. I had seen the project online and assumed this kit included the raw parts I could CNC, but instead, the parts were already milled out. I just had to engrave them and apply a finish to the wood before screwing the wooden parts onto the steel plate.
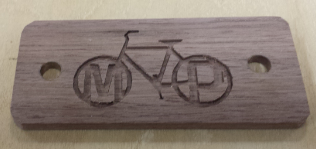
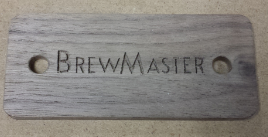
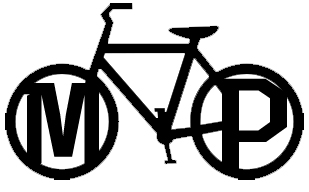
My wife is great at graphics so I asked if she would draw up something nice for me. I wanted each wooden piece of the handle to have an image on both sides so my friend would be able to choose what he wanted the handles to display. My wife gave me 4 good designs to use: one of just my friends name, the other with the word “Brewmaster” a third with a bicycle with my friend’s initials embedded in the wheels, and finally a logo of the beer my friend brews for the bike shop. You can see some of those original images below.
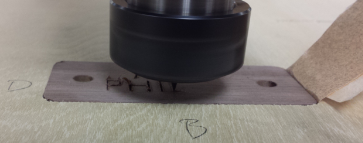
I would need to mill a pocket in some scrap wood exactly the size of the wooden blanks of the bottle opener, stick the blanks into the pocket, and then mill out the designs. This was much tougher than I realized.
The DXF file template from inventables of a the original bottle opener was not the same size as the actual wood blanks, so I had to break out the calipers and scale everything up. Secondly, nothing about the wooden blanks was standard. Each one was a slightly different size and the holes for the screws were in different places.
The process is fairly simple. Take the SVG files of the designs, then import them in some CAM software which will also ask for the size of the endmill (drill bit thingy) and plan a path in XYZ coordinates to mill out the design in the SVG file. There’s lots of different software out there. A good (but slightly pricy) one is Vcarve. There are others out there as well including some free and open source tools. A good free one is Makercam. You can actually download makercam to your computer and use it like a regular program, even though it runs in your browser. Another very simple CAM software is Easel which is made by the people over at inventables. They have lots of projects you can download directly to Easel as well with full settings. I recommend you doublecheck feedrates, bit size and all that before actually using the designs though.
When I made the toolpaths for this design I used a 1/64th inch endmill to mill pockets for everything, including the text. I chose this bit because it was small enough to fit into all of the detailed parts of the designs. I used a pass depth of 0.1 inches, stepover of 0.0061 (which is about 39%). For my spindle speed, I set it to 12,000rpm with a feedrate and plunge rate both set at 1 inch/minute.
I placed a wooden blank in the pocket I had previously milled in the scrap board on the machine and began milling the “Brewmaster” design. It is important to note here that since milling the pocket in the scrap board, I never turned off the CNC machine. This allowed me to keep the same Zero position for my X and Y coordinates between each milling. If I changed this, then none of the designs would line up correctly with the wooden blanks. After the first design was milled I realized the design template from inventables was really wrong about where the holes for the screws had been drilled. So I scaled the design down and tried again. Luckily I bought 2 of the bottle opener kits, so I had extra parts to use in case of a disaster like this.
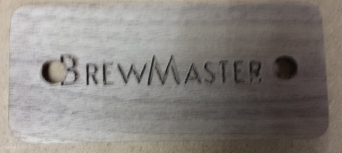
After about 5 hours of milling, everything was finished. I had to go in and manually clean up the edges of the cuts a little with a razor knife and sand paper. Then I rubbed on a few coats of linseed oil to protect the wood. Any food-safe finish can be used such as Mineral oil or Olive oil, but I happened to have linseed oil in the garage. I forgot to take pictures of the final product, but you can see what one of the blanks looks like. I did both sides of each wood blank, each with a different design so he could flip them around.