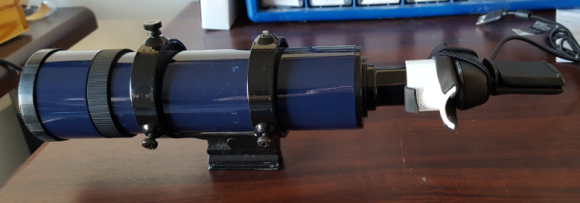
I’ve finally gotten jealous enough for the astrophotography subreddit to get back to work on this project. Jess bought me a Meade LX10 8″ diameter telescope several years ago for my birthday. I’ve used it quite a bit to view planets and try to take deep sky astrophotography pictures. This telescope isn’t one of those fancy ones you can type in whatever cool thing you want to see and it’ll drive itself to point right to it, that’s called a “GO TO”. Rather it has a simple “barn door” tracker motor. Basically, if you align to perfect true north, and set the wedge (the thing that mounts the telescope to the tripod) to your latitude, whatever you point the scope it will stay in view for hours in the eyepiece. If I know where to look, I can attach a camera to the scope and leave the shutter open and get some amazing pictures of nebulae and galaxies.
Being that I’m no good at polar alignment, I decided a few years ago to build an arduino interface that will connect my scope to my computer. The way this works is that I attach a webcam to the spotter scope (the small telescope that helps you find stuff) which looks at a particular star. The webcam pipe data into a program that sends signals out to the arduino to move the scope to keep the star in the same part of the webcam’s view. This way, I don’t have to be perfectly polar aligned, the software will help adjust the position of the scope for me.
I went on the hunt for a webcam that would work well with Windows and linux. This is because a lot of people are buying Raspberry Pi boards,connecting a webcam to them and attaching the whole setup to the telescope. Right now I’m testing on a windows machine so I need a webcam that’ll play well with both. I looked up the Linux Universal video Class (UVC) drive list to find a good modern camera. This list shows a good number of webcam models and brands that are known to work natively in recent linux distros.
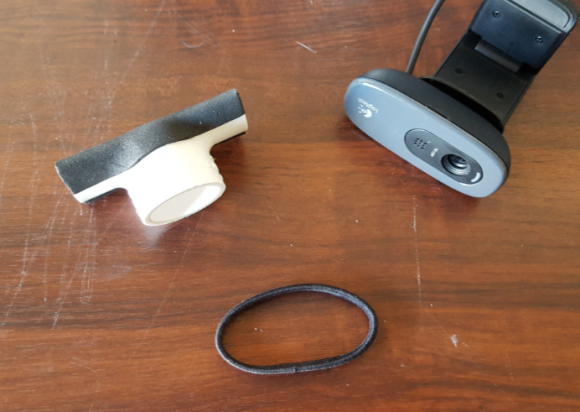
The camera I landed on is the Logitec HD Webcam C270. It is a very cheap 720p 3 megapixel webcam. That’s overkill for the telescope, but it’s a good general use webcam and we can use it for video chats and such as well. This means my solution to attaching the camera to the scope can’t be permanent.
I keep a bunch of 3/4″ PVC pipes and connectors in the garage for prototyping, so I grabbed a 3/4-inch T connector. This connector can easily accommodate my 1″ outer diameter sighting scope.
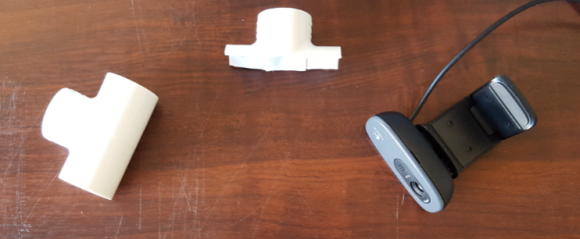
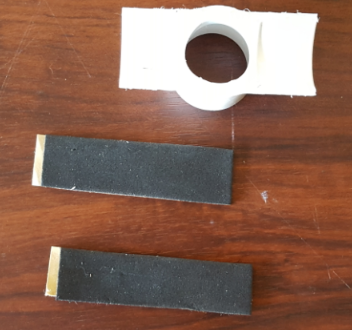
The scope doesn’t fit perfectly, so I added some 2mm sticky-backed craft foam for a snug pressfit. (On a side note, I can’t tell you how useful it is having this kind of foam in the toolbox for all sorts of random purposes. I use it all the time) To accommodate the webcam, I used a hacksaw to cut a portion of the PCV connector off as shown. Then I wrapped a 3/8″ piece of foam on each of the cut edges of the PVC where it will touch the camera. This will help the camera seat well and stay in place when I attach it to the scope.
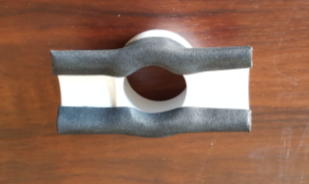
Finally, I used a smooth “ouchless” hair tie to hold the camera to the PVC tightly and aligned the camera with the hole in the PVC T-joint. Again, believe it or not, these hair ties are pretty useful for random jobs. In fact, I use a 8-inch smooth headband made of the same material to hold on my cheapo dew shield (more on this in another post.)
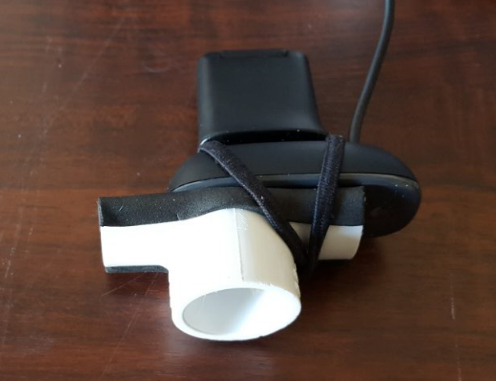
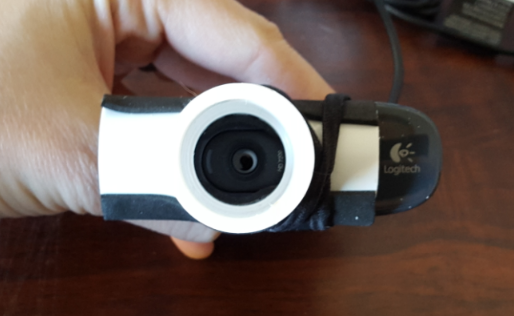
The final product is easy to use and quite robust. I think it’ll work quite well with my the rest of my setup. Since I’m still working that all out, I’ll post more as I learn more.