Building a Zen Meditation or Seiza Bench for better Posture at my Desk

I used to have a standing desk for years, but since we moved, I haven’t found a similar solution. My posture is suffering because of it. I discovered that by resting on my knees at my computer desk, and raising my computer screen a bit I can get back in to the correct posture. I realized I could build a seiza bench would be the best solution to add a bit of support and reduce stress on my knees.

I began with an exhaustive search online but ended up just making my own. The design I liked most was this travel seiza bench from Sakura Co.  While they list the dimensions on their site, I found that to be too short for my needs. I experimented, having my wife help measure how high my butt was from the ground when I was in the best position, but the best experimentation was when I went to build the bench in the garage. I sat on a bucket which happened to feel like a comfortable height. I have a variety of buckets in the garage so I tried them all out. I took measurements of the ones I liked most and went about freestyling the design.

I had an old 7 1/2” wide by 3/4” thick pine board from a previous project laying around the garage, so I began with that. I laid out the 2 heights I measured and drew a diagonal line to connect them. This will be the final angle of the bench. Then I went about measuring and calculating the tab lengths. Here’s what I ended up with.

image

In that pic, I had already made my first cut. Basically the back of the bench is 11 3/4” tall, the front is 10 1/4” tall. this is a pretty steep angle, but I feels acceptable so far as I’ve been using it, though I haven’t used it much yet and I may end up making a different angled bench.

The tab that sticks up at the top rises about 2 1/8” above where the bottom of the seat will be. It has to be high enough to go through the seat and accept the holding pin to mount the legs with a bit of material on top of the holding pin. That’s how I came up with that measurement.

I tweaked the design from the inspiration more by having my tabs move at a 90 degree angle from the slant, rather than follow the edge of the board as in the bench form Sakura Co. This makes is far easier to construct.

This entire project can be built using 1 pine board, electric drill with a 3/4” drill bit, and a jigsaw. I had other tools available so I used a circular saw to cut the board all the way across as you see in the above pic.

Next, I used the bandsaw to cut the excess material away from the tabs. You can see that I forgot to tune my bandsaw before cutting.  This board looks pretty janky.

image

At this point, I messed again when cutting out the hole for the pin to fit into. I thought it’d be smart to drill a couple of holes just big enough for my jigsaw blade to fit into. I should have used the largest drill bit that would fit the hole instead.  This made for a nasty cut where the pin is supposed to be tight.

The idea is to drill a hole or two to give your jigsaw blade enough room to cut the edges and the corners. It takes a few passes from different angles, but I got it done. Now I got my 30+ year old jigsaw out of someone’s garbage can… it’s missing a few screws, but gets the job done, even if it isn’t very clean.

image

image

The next board was easier to cut since I tuned up the bandsaw. It came out with much cleaner edges.

image

I made the same mistake of using too small a bit to drill the hole, however I did learn something.  When drilling the hole in the first leg using the spade bit, I just drilled all the way through.  This tore out the back and made a nasty edge.

image

This time, I drilled a into the piece from one side until just the tip of the spade bit poked through the back and I stopped. I flipped the piece over and placed the tip into the hole to line it up and then drilled the rest of the way through the wood. This left a much cleaner edge.

image image

I’ll spare you the carnage from the jigsaw. It was better than the first one, but not good overall.

I then moved on to the seat. I cut a 22” long piece from the board. I measured 2 inches from each end to begin marking where I wanted the legs to mount. Due to the slat, the legs will stick out a bit from the seat about 3/8”.  I decided to make the front of the legs flush with the seat and allow that excess to hang out the back. No one will notice that, and I won’t be annoyed by it while using it.   I drew an arrow on each of the 3 parts to determine which side was the front. Then I traced the outline of the tabs for each leg on the seat board. I want as tight a fit as possible with this so it doesn’t wobble when I sit on it. Since each leg’s tab is a bit different due to my excrement woodworking skills, tracing the actual shape of the tab will get me a closer fit.

image

This is when I wised up about the spade bits. I mounted a 3/4” spade bit into my drill press and used the trick of going not quite all the way through the board, flipping it and drilling from the other side for a cleaner hole. Somehow I still managed not to get it perfect.

image

I made the edges and corners straight with the jigsaw again on each side.

Then I used some scrap wood and cut the pins on the bandsaw. I didn’t get a pic of them alone, but I made them wedge shaped with 2 right angles and a slanted side. One side 3/4” tall and the other 2 1/4” tall. The bottom edge (the longest edge which is at right angles to the sides) is 3 1/4” long.  I made two of them.

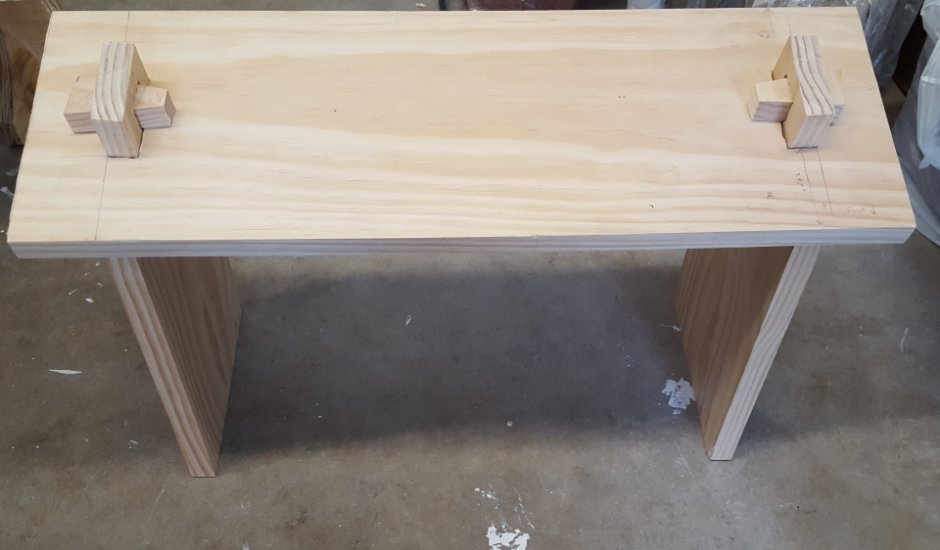
To even out some of the nasty straight cuts, I went to my trust poor-man’s belt sander setup by clamping my handheld belt sander in my workmate project center and locked the trigger in the on position as I maneuvered the parts on the 150 grit sandpaper. Put  the puzzle together and you have a bench!

I use a pillow on the ground under my knees to add some comfort, and I may eventually get either a couple of gardening knee rests (one for my knees and the other for my bum) or an hammock pillow for the seat. Given the ridiculous costs of hammock pillows though, I might just make a thin seat rest pillow myself to tie around the seat.

Revamp Your Old Kitchen Table with this DIY Tile Idea

FTC disclosure: This post contains affiliate links, which means I may receive a commission for purchases made through my links.

We’ve had the same table for more than 10 years. It was showing some serious wear, especially once the little one came along. The table isn’t made of actual wood, it’s compressed dust with a thick wood veneer. For years Jess wanted to do a tile mosaic on top of this.  Due to an abandoned project (I was going to build a tile gas fireplace for our patio), we had some tiles in the house. We had both this wood-patterned tile (which is on clearance for half off at the time of writing this blog post!) and this Spanish patterned tile. Both of these can be substituted for other tiles and patterns depending on your personal preferences and table preferences. For instance, this similar but more gray tone wood-patterned ceramic tile  would pair well with this patterned tile.

We arranged our tiles on the table just to see what different designs might look like. Here were our three main options based on tile and table size:

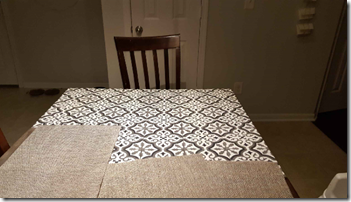
1. ) This first arrangement idea was the Spanish tile on everything. This was too busy by itself, so we added our place mats to break up the pattern.

design option 2

We weren’t really feeling that one, so we tried a different arrangement.

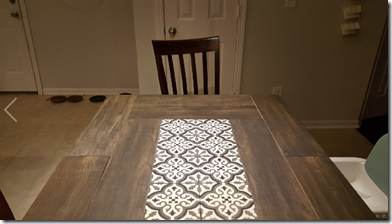
2.) The second idea was with a centerpiece of the Spanish tile and a border of tiles that look like wood planks.  Overall we liked the look, but it didn’t work out well because the two types of tiles were ever-so-slightly different dimensions.

design option 3

Plus, if you are going to go with a bold tile you might as well feature it, so…

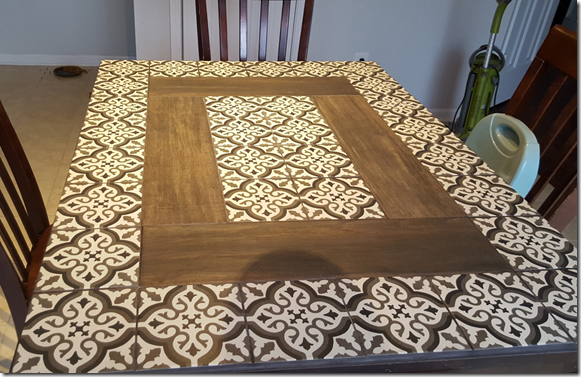
3. For the third idea (which we picked) we laid out a Spanish tile centerpiece and border with the wood tile only in the middle.

final

Once this was decided, we glued the tile down to the table with acrylic adhesive.   Once this dried for a week or so, we then grouted the cracks with a dark grout called “truffle”. A couple of things we learned was not to have too much water in the grout mix, otherwise it’ll dry with lighter whitish spots in places.  This was (sort of) fixed by using white vinegar. Another thing we worried about was the edging. At first we just used the grout and our finger to cover the edge of the tile and smooth the transition to the table edge, but over time this proved quite fragile and pieces kept breaking off. The fix was to move to a silicone caulking material (in Charcoal color, the best match to the Truffle color we could find). This isn’t the first time we used silicone caulk as you can see on our hardwood to tile transition of our flooring.

When we applied the sanded silicone caulk, it didn’t look the same at first, but when it dried it became much darker and looks great!

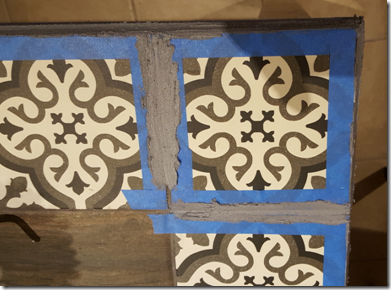
First we laid out painters tape on the whole table, including around one tile that had come off when I got too aggressive digging out the grout on the edge.  We then caulked around the edges with this sanded caulk, smoothed with a gloved hand and then peeled off the tape. Don’t touch it for a few days!  It takes a long time to cure.

caulking2      silicone calking

Overall, it has been holding up great to the wear and tear of our toddler. This DIY has brought new life to an old table.

Annotating (Grading) PDF Assignments

For a while now, I’ve been asking my students to submit their work as PDFs online using moodle (or email).  I always use open source tools to annotate and grade these documents.  There are several apps out there for this, I happen to use Xournal.  The problem was that my preferences in Xournal were never saved.  So I figured if I had the problem, maybe others do to.  Here’s how to fix it:

First find where the preferences are stored.  In Linux, these are found in a text file in my Home folder. I assume it will be similar in Windows.  I edited this text file to automatically start with good grading tools already selected: ie. Red text with a Serif font.

$ gedit ~/.xournal/config

Then Ctrl+F and find “startup_tool”  set this to “text”

Then Ctrl+F for “pen_color”and change this to “red”

Finally Ctrl+F for “default_font” and set this to “Serif”.

Save the file and you are done. Now every time you open Xournal, these settings will be loaded and you can just start commenting and grading without having to do any additional tool selections.


UPDATE: In Windows, Xournal configurations are hard to find.  You must first set it up so you can view hidden folders and files (Go to Start menu–> Control panel –> Appearances and Optimizations –> Folder Options –> Show hidden files and Folders.  Look for the radio buttons and select “Show hidden files, folders, or drives”.  While I’m in here I usually also uncheck “Hide extensions of known filetypes”  which lets me rename files including their filetype and see what types of files they are directly.

Once you do this, you can run Xournal and “Save Preferences” once as Ken mentioned in the comments below. Close Xournal first, then go to the path “C:Users\<username>\.xournal  (Notice the dot in “.xournal”!!!) Open the “Config” file in a text editor (like notepad or notepad++ or Sublime text editor)  Now you can make the changes above, and save.

A note of caution, edit a PDF with text, export it, then open it in another PDF reader to make sure it does not mess up.  Sometimes when editing the config file, the Font doesn’t work correctly and I end up with garbage text and random characters on my exported copy which isn’t useful for students.  If this happens to you, simply delete the config file and start over.


Adam-Atom

My Craft Room’s Beginnings

I have a tiny room in my house.  It is like a closet with its own closet.  Keep in mind that my husband and I live in a house with four bedrooms.  What do two people do with four bedrooms?  Fill them with children? Well, we don’t have any (at least not yet).  So we have our bedroom (1), our “SheekGeek” warehouse (2), our office (3), and this tiny room (4).  This tiny room was destined to become my craft room, but it was not an easy journey.

Read moreMy Craft Room’s Beginnings

Jewelry Box Makeover: Personalized Gift

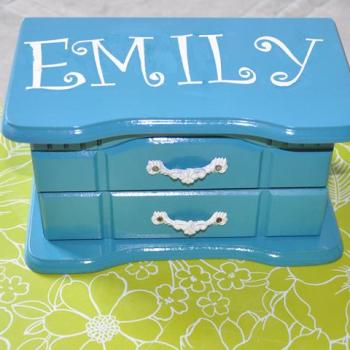
For my niece’s 6th birthday I wanted to make her something special.  Because she is glamorous, I figured anything related to jewelry would be a good fit.  At the GW Boutique (ahem, Goodwill), I found the perfect starting point- a child sized jewelry box for $4.  Score!  With a little bit of paint and time, I ended up with a gift she really loved.

Read moreJewelry Box Makeover: Personalized Gift