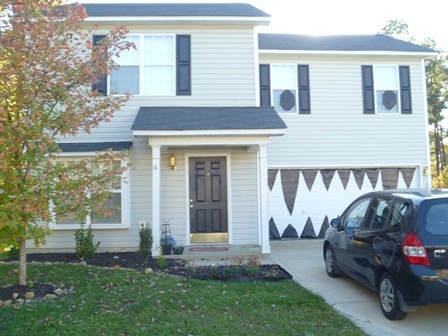
In June of this year we moved into a new house. It was a foreclosure and unlike our first house, we had to tackle quite a few projects to get this place back into shape. Some of the things we’ve done so far aren’t really required, but make us feel better about the space. One of those projects was to put in a glass and tile back splash in the kitchen.
The color on the walls when we first moved in was actually a tinted primer and it was was on every wall. The problem with primer is that is kind of absorbs oils and such when you touch it and there were several paces that had shiny spots from this. Jess painted the entire downstairs in almost the same colors as our first house. She stopped short and only did edging in the kitchen. I should have known something was up…
One day I come home to find she’s bought a bunch of glass tile and grout. We didn’t really discuss it beforehand in depth, it was one of the many things on the list of things we eventually wanted to get to, but it wasn’t very high on the list. Neither of us had done tile before but it seemed like it might be fun and literally cost about $250 in total so it wasn’t a hugely expensive project.
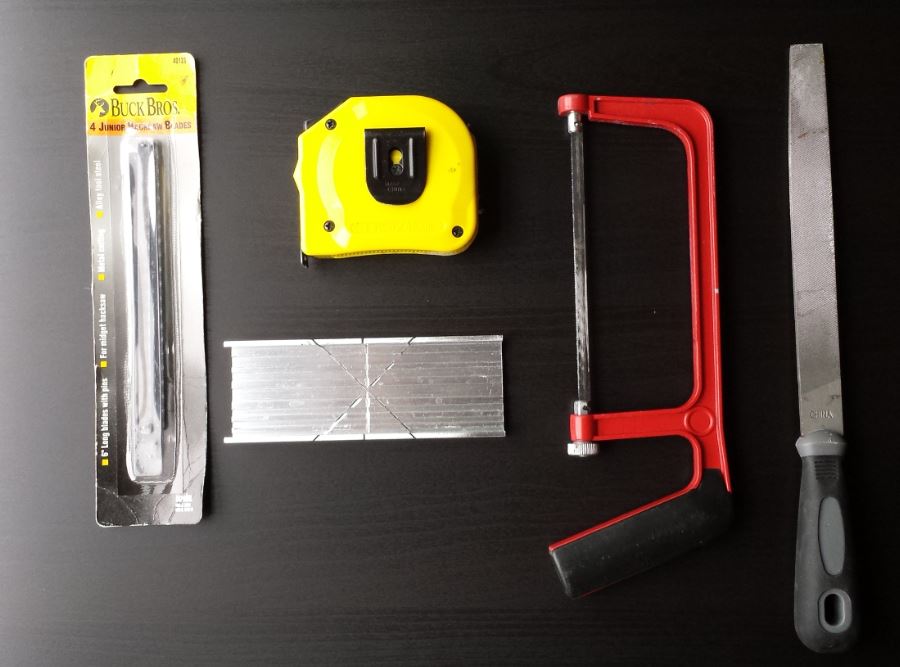
Though it took us one and a half complete days (literally like 18-20 hours of work) for the entire tiling job, I think it best to break down the task into several logical subtasks. I learned a lot while edging the area we planned to tile. The tools required include:
Jess wanted to just start tiling and then use some of the extra tiles to make an edging for the back splash. I disagreed and wanted a more finished look. We agreed to try out some edging material and see what it looked like. The edging we got was an extruded aluminum in brushed nickle finish. The brushed nickle has browner finish to it. We chose this because while the other walls in the house were painted light gray, the light fixtures were a dark bronze color. The appliances and interior doorknobs are brushed stainless steel. The brushed nickle somehow ties all of these together.
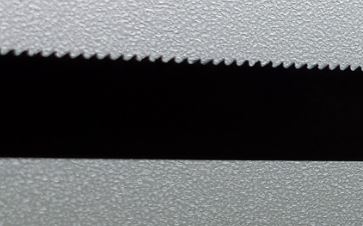
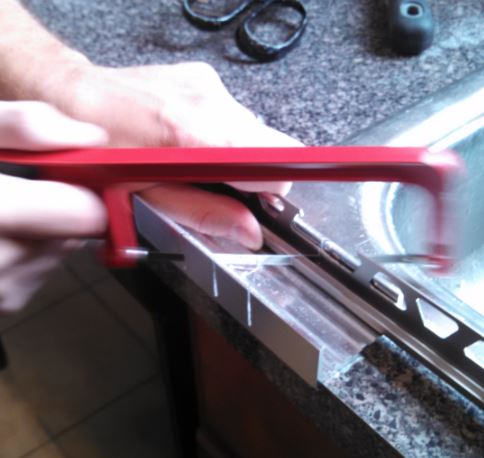
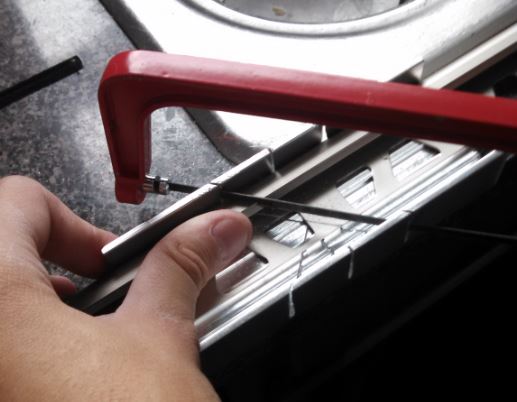
We discussed different placements of the edging because the counter tops and upper cabinets were not placed in vertical alignment with one another. We chose in most cases to align the edging with the counter top. I began cutting the edging for test fitting. To cut the edging, I used a hacksaw and an aluminum miter box from a hobby shop. This proved to be invaluable for making accurate 45-degree cuts! Always use a sharp blade and you can put the blade on the hacksaw so it will cut on either the push or the pull stroke of the saw. For this kind of precision work, I find it easiest in most cases to put the blade on so it cuts with the pull stroke. The way to tell which direction the blade will cut, simply look at the teeth. Usually one side of every tooth is angled with a gentle slope and the other side has a harsher slope. The harsher slope is the cutting edge. By flipping the blade in the hacksaw, you can determine which stroke (push or pull) will be the cutting stroke. Typical saws cut on the push stroke, but some saws (especially those used for precision cuts like the Japanese pull-saw) cut on the pull stroke.
TIP: Use a miter box and insert the hacksaw blade such that it cuts on the pull stroke for more precise cuts.
Once the sections were cut, we placed them on the wall. We chose to edge the entire top of the tiles where they meet with the cabinets. When tiling, you usually have your tile starting at the bottom of the wall, then tile as high as you can until you hit the bottom of the cabinets above. Then you cut the tiles to make them fit to the edge of the cabinets. It is usually OK to do this because people don’t usually see that last row of tiles, but in our case the tile we chose was very thin and hard to cut. When we measured the distance form the counter top to the cabinets, we found we were off by 1/4-inch in some places. This would make it very hard to cut the tiles lengthwise to fit. The edging, on the other hand, has about 1/4-inch of space that you can use to make up for any gap. So we decided to edge under the cabinets as well.
TIP: Edging material can be used to give you a tolerance of 1/4- inch so you won’t have to try to cut tiles length-wise.
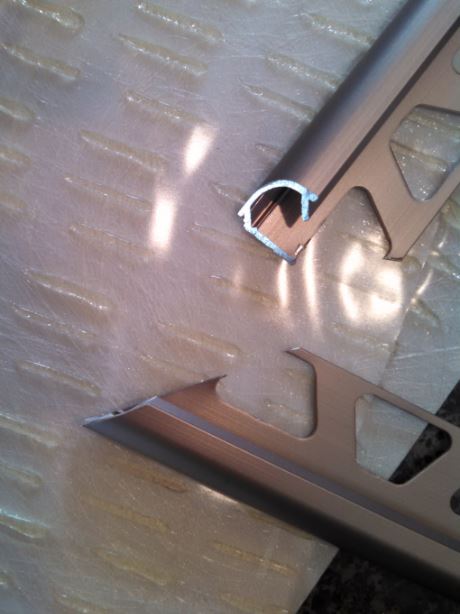
We held the edging in place on the wall with tiny tack nails. The hardest thing about edging was what to do in the corner. We had to do a miter cut of 45 degrees, but we had to do so on the face of the edging material. I simply turned the edging material in the miter box so I could cut the angle I needed.
In the picture below, you can see the two types of miter cuts. The top one is the cut on the face of the edging (This part if for the corner of the room). The bottom one is just a regular 45 degree miter cut that is used in all other places.
In the spot under the microwave oven, the cabinet was off by more than 1/2-inch from the counter top. To fix this without making it look crooked, we simply split the difference. We angled the edging 1/4-inch to the right on the bottom (at the counter) and 1/4-inch to the left at the top (where it hit the cabinet). This made it look good on both ends with no excess space and the edging didn’t look obviously out of the vertical.
TIP: When edging, split the difference between places that are slightly not aligned and match the counter top, not the upper cabinets for places that are largely misaligned.
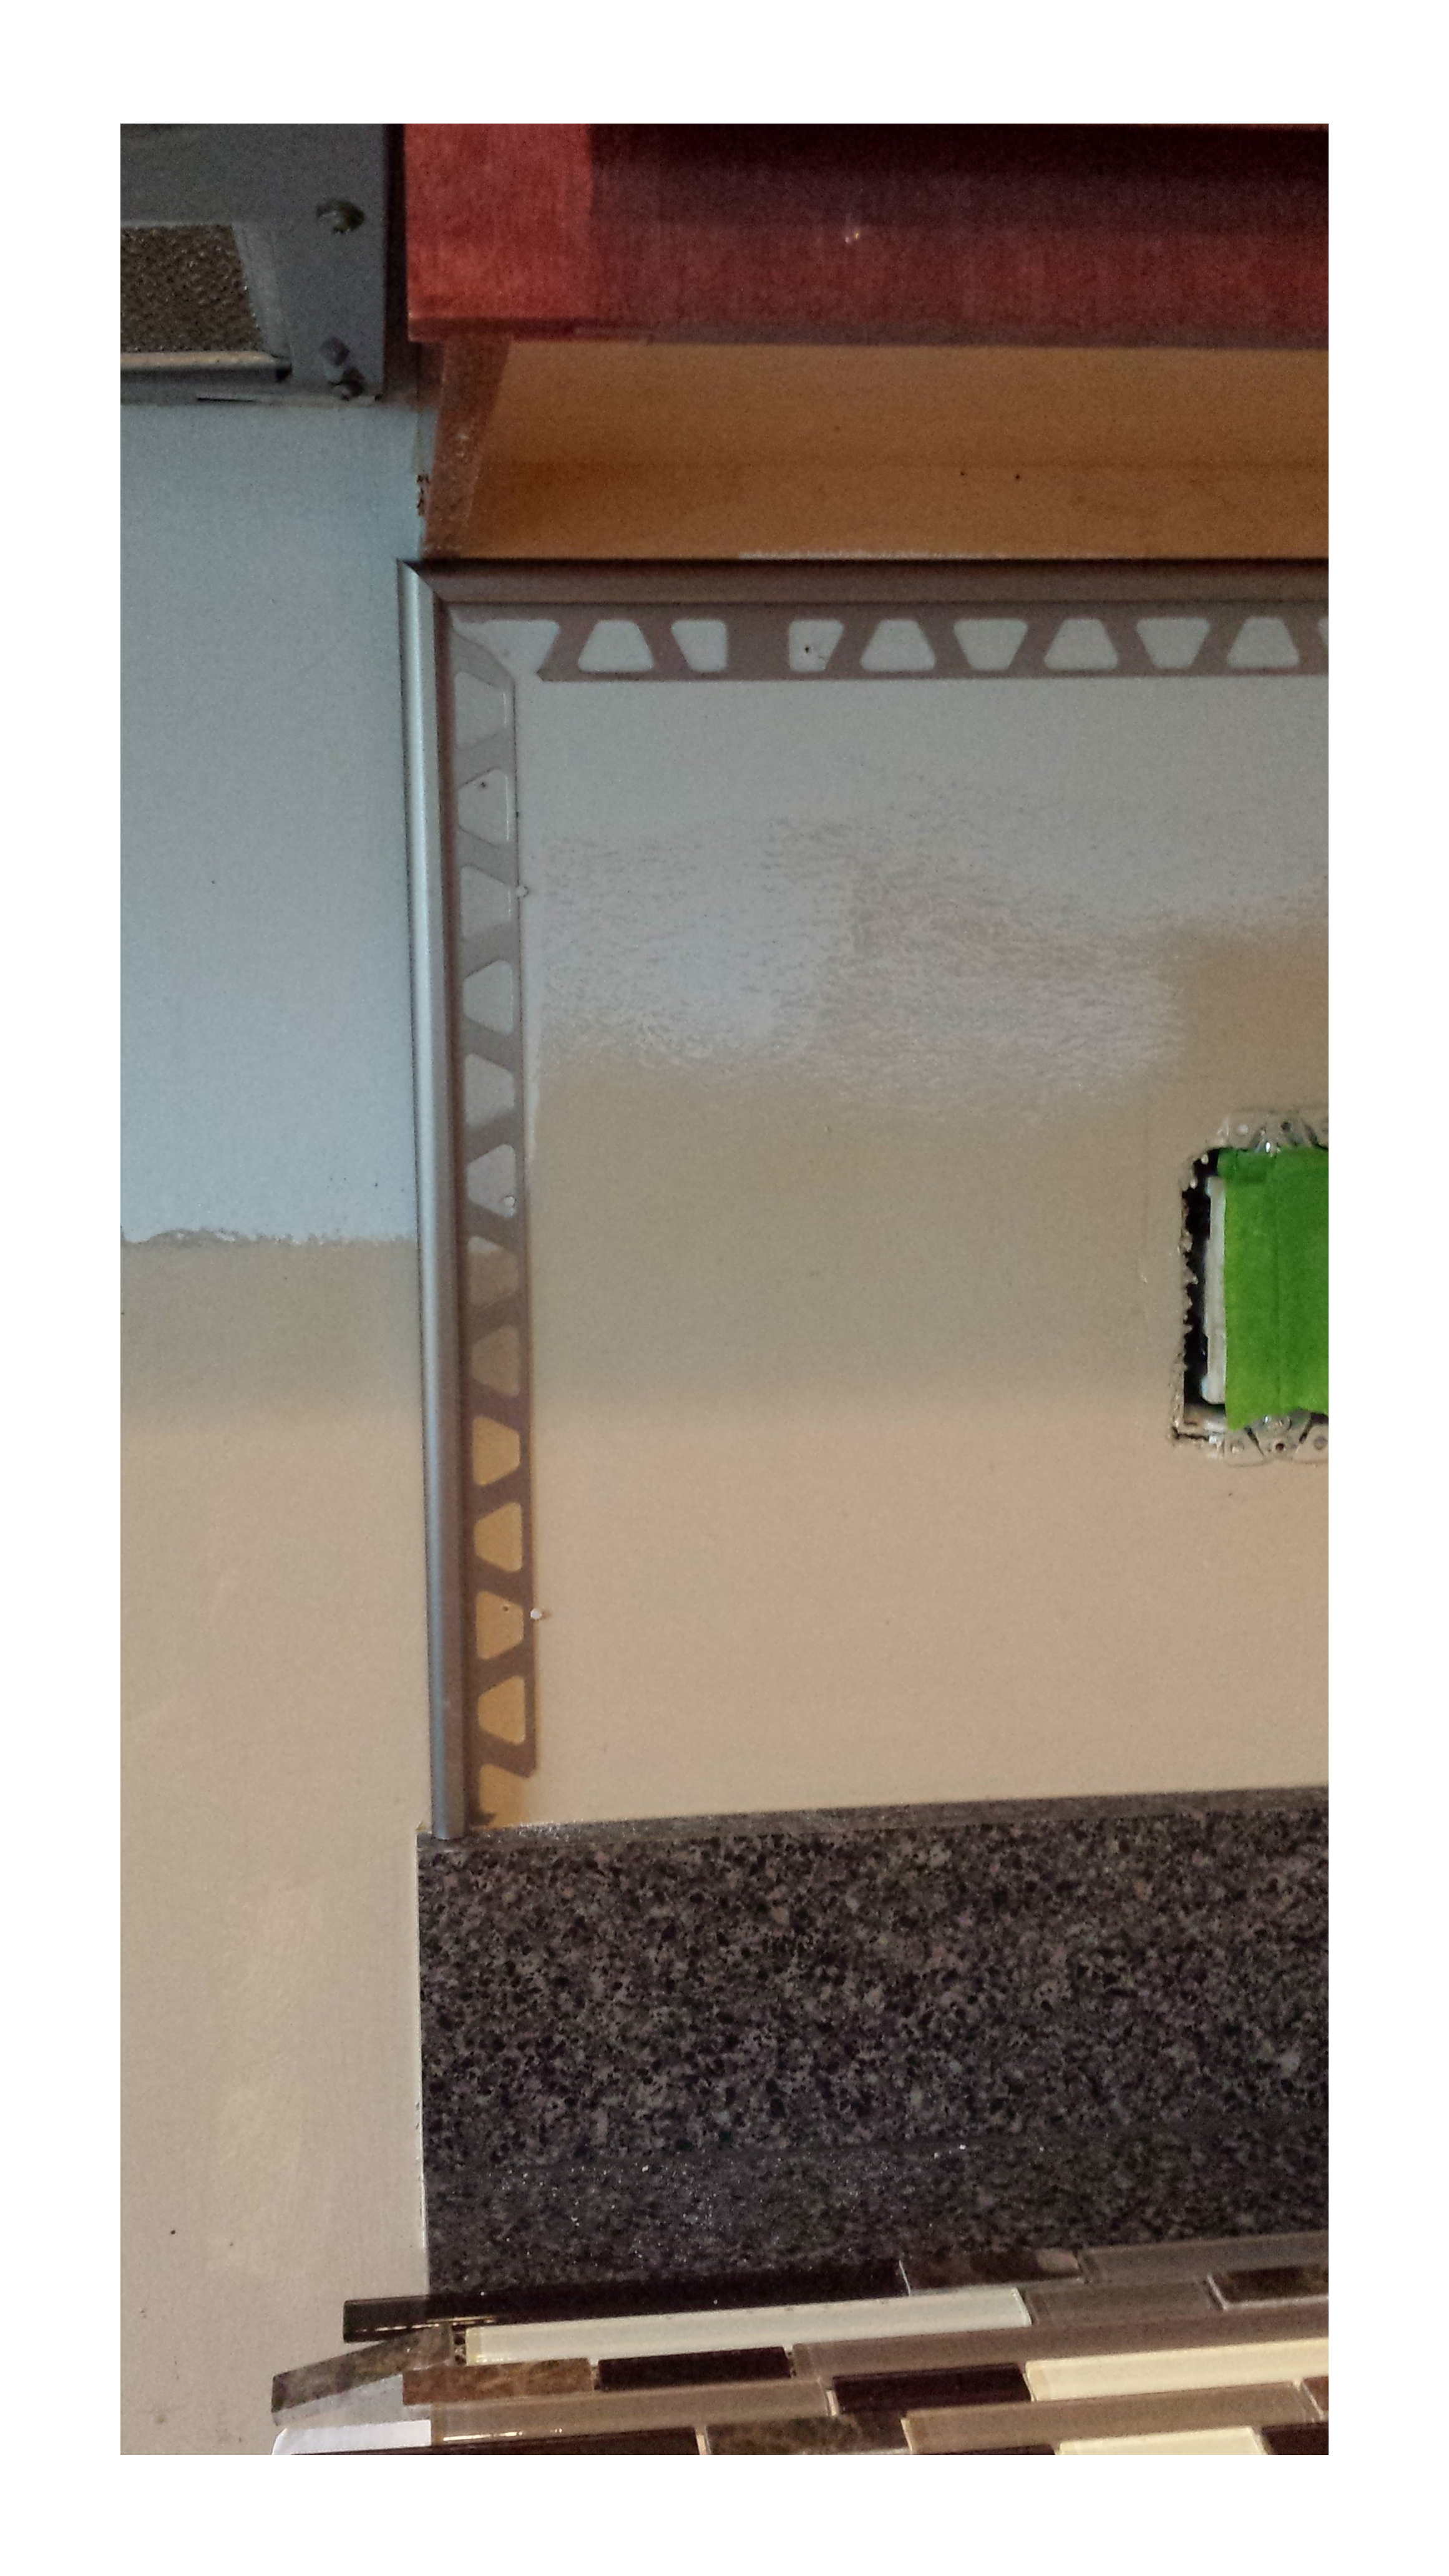
There is still a lot of work to be done, but the finished edge will definitely help give this back splash a professional look.