Tips for Mounting Stock Material for CNCing

Holding a workpiece is always an annoyance. You want to flatten a sheet of plywood so there’s no part of it bowing upward because that will throw off your cut depths. Nothing is worse than thinking you have a tab holding a part in place only to find out that the tab was too thin or nonexistent when the interior piece starts getting all chewed up and flopping around, breaking stuff. On close inspection you can see that on your final couple of passes, the tab was cut too thin or clean through because the wood was bowed upwards. Without a vacuum table, there’s only so much you can do, but I’ve found a few ways that seems to work great. Screwing or clamping the wood to the spoilboard is OK, but it makes certain areas no-go zones for your bit. My methods will help you use up every square millimeter of the wood if you’d like.

Dealing with the Wood Itself:

The wood itself is always as straight as I could find, but it’s never perfect. I lay it on my machine such that the cupped edges stick up in the air. Then I mount down the edges.  There shouldn’t be a bubble in the middle because the curve was originally downward to begin with and since I affix the edges (where all the stress to move upward is) it lays pretty well.

image

Traditional Method using screws:

Sally from Shopbot showed me a nifty trick. If you do use screws to secure your stock to the machine you want to make sure your toolpaths will never touch the screws (lest you break your bit or mill your screw head off). Sally’s trick is to add these screw holes to your design.

  1. Lay your stock on the machine and center it but don’t mount it.
  2. Open your cutfile and add small circles (1/8th – 1/4th inch diameter) about 1/16th inch deep to the design. These are the locations of your screws. Make sure they won’t interfere with any cutpaths and that they will be in a good position to secure the stock.
  3. Export just these circles as a cut path and cut them.
  4. When finished, add screws in these locations (The black circles in the image below)
    image
  5. Delete these added circles from the design
  6. Cut your design file as normal.

This method works great, however if the stock is bowed or there are small clearances in the cutpath of your design, or if you aren’t using tabs to support interior pieces this method might not work for you so try the other ones listed below.

Masking Tape and Cyanoacrylate (CA) Glue (Super Glue):

I stole idea this from a few places. Machining metal parts you can straight-up super glue them into place on your vice. Make sure the faces are clean of oil and debris first of course. When finished, you can simply dissolve the glue with a heat gun to remove your part.

The problem with wood is that if you superglue it, it can make it all nasty looking for the next few steps of the project. And what if you wanted a nice natural finish? The solution is to use masking tape. You’ll lay down a piece of wide masking tape to the spoilboard, then apply another to the stock material. Lay down a line of CA glue on the piece on the spoilboard and spray the piece on your stick with CA activator. As soon as you touch the two that piece is going to stay in place pretty well.

This method works best with smaller material that isn’t very tall. It also allows you to cut pieces on top of the tape without the need for tabs.

Masking Tape and Hot Glue:

For larger pieces of stock I’ve found the use of wide masking tape and hot glue to hold large sheets fairly well. You might think hot glue isn’t a good choice, but I’ve used hot glue to hold down guitar body blanks on my large planing jig while I router-planed them to thickness without any issue. These were solid poplar about 1 and 3/4 inch thick. I simply use a high temp glue gun and a harder (rather than flexible) glue.  I’ve also used it to mount 1/4” plywood on my CNC machine for tons of engravings and through cuts to great success.

On the CNC machine, I used masking tape to lay down on the spoilboard since I was doing a bunch of cuts. After a few pieces of plywood were cut the glue makes it hard to get a flat surface so you can just pull it up and put down new tape to glue to. The masking tape sticks to my spoilboard on my machine making an outline of where the wood will go with a bit of overlap so that the wood lays on top of about 1/2 the wide of the tape. Align the tape with the router head, not the machine itself. Move the router 10 inches at a time and make sure the middle of the tape is right under the bit. Here you can see the 1.5-2inch wide masking tape just under the wood:

image

The Endmill (the Bit):

An additional tip for keeping the material flat is to always use Down Cut endmills or compression bits on pretty much all plywood cuts. These endmills have the spirals cut backwards such that the normal spinning of the bit puts pressure in a downward motion as opposed to upward. Compression bits actually have regular flutes on the top, but reverse flutes the rest of the way up to give a nice finish on the both sides of the cut. This isn’t a great thing to use for deep narrow pockets, but for plywood stuff it works very well for making sure the material doesn’t raise up when you are cutting.

Can you think of any other tips or tricks I haven’t listed here? Leave a comment and let me know about it!

Book Review: “Hot Seat” by Dan Shapiro

Since we placed an order for the GlowForge laser cutter (more on this in another post), we got a pre-released copy of the Dan Shapiro’s upcoming book on Startups and Entrepreneurship “Hot Seat  The Startup CEO Guidebook” Dan is the CEO of Glowforge and has a string of successful startups behind him such as Ontela (now Photobucket), Sparkbuy which he sold to Google, and Robot Turtles which is a board game designed to teach children as young as 4 years old about programming and logical thinking which he did as a kickstarter and which is now available in Target stores.

“Hot Seat” is basically a cheatsheet on startups broken into 5 parts. Founding, Funding, Leadership, Management, and Endgame. Dan explains his history and cites specific people and examples of practices that will help you navigate the dark waters of a startup.  The first section of the book is all about Founding. There are some great tips here I wish I used in my previous business ventures. Founding is a dirty and scary thing for every startup. You want to think about contingencies from the start. Dan recommends to do this before you even incorporate.

In the first section of the book, Dan gives advice on everything from who should be a cofounder to even providing a template for a decision matrix on what projects your startup should focus on. He also gives great examples of how shares might be calculated for different types of cofounders, answering the question of “How much is each cofounder really worth?”.  These kinds of things are what make this book awesome. Dan also freely gives advice that I’m sure he learned the hard way. Some of this advice is common sense, but there are plenty of gems you’d only learn from a good mentor.

Each section has several chapters in it. Again, the information comes straight from Dan’s personal experience. For the Funding section, there are slides directly from the pitch deck of some of Dan’s successful ventures.  He breaks down what to put on each slide, and how to best present it. Arguably, this could be considered style more than anything else, but with a record such as his, and the fact that he now is an investor in other startups I’m going to go out on a limb and say it’s more than just style. There ae several other chapters in the funding section that explain the differences between different types of investors and what each of their motivations are, which is what you need to keep in mind if you are pitching ideas to them.

In the Leadership section, he discusses the different duties of a CEO, and how to cultivate a good company culture. I think anyone applying for a new job or even considering changing jobs would find this section interesting because you can tell a lot about how day-to-day interactions reflect the culture. The CEO is the taproot of the company’s culture and is the archetype all the other management will follow. It says a lot about a company if everyone is constantly gossiping…

While I’m not a CEO right now, I am in a newer management position at my full-time gig. I found the management section of this book very helpful. I’ve memorized some of it as one-liners that I can repeat to myself to help me learn this new set of skills. My favorite and most obviously useful advice in this section was on “playing the CEO ‘Inspire’ card”. This section also gives great general tips on hiring, whether you should buy or lease furniture, how to deal with a board of directors.

The final part of this book discusses the Endgame. What are the different types of acquisitions? Who do you negotiate with?  It stresses how important it is to have done things correctly and thoroughly from the beginning of the startup.  Technically, the entire goal of any startup is to either be bought or to reach critical mass and go “Google” on the market and end up buying other startups. Either way it is important to know what to expect. Dan gives the example from his previous company Sparkbuy’s acquisition by Google and breaks down the different parties involved and somewhat what to expect in negotiations.

Overall, I really enjoyed Dan’s book. It gave more gritty details than any of the other books on buiness and startups I’ve read. The devil is in the details and while this book stops short of giving you legal advice, you get insights on how things are supposed to work.  Personally, it reaffirmed my intuitions on getting a business started correctly and having contracts in place for the “big day”; be it an exit, acquisition, or other huge event for you or the company. The book will be available in paperback May 2015 and

I just bought a GlowForge laser cutter and here’s why

UPDATE 2017: I canceled my order for the Glowforge as life happens and I couldn’t afford to let them earn interest on my money anymore. I just had to get my money back for life reasons. I do still recommend you get one if you can. I’ve seen them in use in person at Charlotte Latin FabLab and it is really awesome!

Original article below:

So for the last 7 years or so, Jess and I have considered purchasing a laser cutter.  My personal goal is to have my own FabLab. I’m partially there with Jess’s KNK Zing vinyl cutter and my Shapeoko/Xcarve CNC machine.  The two main missing components are a 3D printer and a laser cutter.  Being a FabAcademy alum and running a FabLab at work, I am intimately aware that lasers are the most used (and arguably useful) machine. They are definitely the most fun to play with.  They are also the easiest to make money with (It’s always easiest for me to justify big purchases with the expression “hobbies that pay”). For the past several decades, laser cutters or laser engravers have been used in trophy shops and all sorts of companies. You can use a laser cutter to make products to sell on Etsy (as many people do), make the most amazing personalized birthday and holiday gifts, prototypes of ideas you have, or just make cool stuff for yourself.

I recently saw a new laser cutter on the market and I held back for a while before making the decision to buy it. That may have been a mistake.  The GlowForge is shaping up to be a great machine. I’ve followed it since September, when they were offering 50% discounts on all models.  At the time of this article, they have raised the price to 40% off retail price. And, if you use this referral code, both you and I will get $100 off our orders! (In full discretion, I have had no contact with Glowforge, nor have I actually use the machine myself yet. I’m just really stoked with this machine and its potential. I do have a PhD in Computer/Electrical engineering with Computer Science background and I run an official node of the FabLab network that was started at MIT, so hopefully I’m not off base here… )

There are lots of cheap ( <$15k ) 40-watt laser cutters on the market such as some cheap Chinese ones from Alibaba, or Full Spectrum.  So why go in on a Glowforge?  Well quite simply, it is the best designed laser cutter for FabLab/Makerspace/Hackerspace use. Unlike others in the price range, you don’t need a 5 gallon bucket of distilled water and a fish pump to cool the laser tube (yes that’s a real thing some other models at these prices require and it is ridiculous). It breaks the paradigm of how users interact with a laser cutter.  It is following some of the latest research on user interface and user experience in the field of computer science.  Honestly, those are project I wish I could implement myself but didn’t have the time. It brings together lots of great solutions from these projects and crams it all into a single package.

Paradigm shift #1:   Unlike traditional laser cutters, where you print to the machine like a printer on a network or connected to your computer, Glowforge can be printed from practically any location in the world. This is because the software is cloud-based.  I used to be wary of this kinds of thing, but since Glowforge also promises to make a version of the software open source, you can implement it yourself if you want.

Paradigm shift #2: Glowforge allows you to easily position your designs on your material using a live camera view of the material.  This is a godsend for those who are familiar with the waste of laser cutters.  To be able to make sure a design will fit on a scrap piece of material, you have to do some measurements, hold your tongue just write when pushing the cut button, and hope you remembered to reset the origin (0,0 point) on the laser before cutting.  Sometimes this can be very hard depending on what was originally cut out of the scrap you are using, you might have a weird shaped area and it can be very hard to find out if you can use it to cut a new part.  There are some ideas being researched to handle this kind of situation and other tools you can purchase that are very expensive, but Glowforge has it built in. Being able to literally move my design on top of a video camera image of the material allows me to use as much material as possible without the risk of mis-cutting and having to toss that piece of material and grab a new one.

Another great feature is to simply draw on the material you want with a pen. The cameras will read your design, vectorize it, then the laser will frickin’ cut it exactly as you’ve drawn it.   This is worthy of some type of award because it will save a lot of time for people. I constantly have students who would benefit from simply being able to draw their designs by hand and quickly cut a part out. Again, this feature somewhat comes from newer research into user interface design of laser cutters I’ve been keeping my eye on for some time now.

Paradigm shift 3: Glowforge uses dual cameras inside the cabinet to not only allow you to place your design on the material, but it can conform and auto focus even on non-level materials.  The example on their web video mentions etching a design on a macbook, but this is sooo much more powerful and useful than just that.  Many materials you want to laser, such as a 1/8″ piece of plywood, have a warp to them. If you focus your laser on the low part of the warp, then keep that measurement to cut the whole part, you can end up with edges that aren’t exactly as you had designed them, or edges that are weak due to the wood not ablating and instead burning. This is bad for a couple of reasons. One it can start small fires, but more commonly your edge is brittle and ashy. This changes the workable dimensions of your parts and sometimes makes them unusable.

Also, the cameras can detect materials you put in the machine.  There are barcodes on the materials you buy from Glowforge, but you can make them yourself, which tell the machine what settings to use for engraving or cutting the material. Settings are different for plastics versus wood, etc.  Even different densities of wood matter, so this is a great solution to the problem of figuring out what power and speed settings to set the laser to use.

And finally on this point, it seems there’s also some image recognition. Put your laptop in there and you it’ll detect it’s a macbook and know what settings to use to best etch it. It can even bring up possible designed others have submitted online for you to use if you want.

Paradigm shift 4: The firmware as well as a simplified version of the cloud software will be made open source. This is great because I can hack on it (as I would have done anyway, but at least now I have a much better starting point) . I’m certain a community of hackers/makers will be adding features, which is exciting since this machine is already starting with an impressive set of features.

Paradigm shift 4:  On the Pro version of the machine, you can open the front and back to be able to cut material that is 20″wide, but infinitely long.  This comes from two places, the vinyl cutting machines that are in the market (which can cut a certain width, but practically an infinite length of material from a spool), the Shaper and the awesome Shopbot Handibot (Shoutout to our friends and fellow Carolinian’s; thanks again for the help this past summer in Pittsburgh Salley!), which can do large designs piece-wise. The cameras on the Glowforge can help align the previously lasered portion with your design and make adjustments as needed.   This is incredibly helpful for making sure the  finished product comes out correctly.

Glowforge will also host a libray of other peoples’ designs you can choose from if you aren’t the artistic type.   This is similar to Makerbot’s Thingiverse or Ultimaker’s YouMagine for 3D parts and Inventables’s project section for CNC projects and file, which can be imported into Easel (Inventables’s cloud-based CNC CAD/CAM software for their line of Shapeoko, Carvey, or X-carve machines).

Words of Negativity: For the specs of the machine, the 20″ wide cutting area is slightly awkward and a 24″ width seems more practical. Also, since the Glowforge isn’t out yet, I have to wait. I have to wait to see if it lives up to these expectations, and also wait to play with it myself.

All that being said, the Glowforge sale at this point is a presale. I won’t receive my machine until summer 2016 or later, but you have until the time it ships to cancel your order and get a full refund.  I expect any bugs in the system will be worked out before I get mine and if not, then I’ll have a good excuse to play with it in more depth.

Adam-Atom

Disclaimer: The only affiliate link in this post is for the Glowforge. All other links supplied in this post are to simplify your internet browsing adventure.

W.A.S.P. 2.0 Manual and Schematic Online

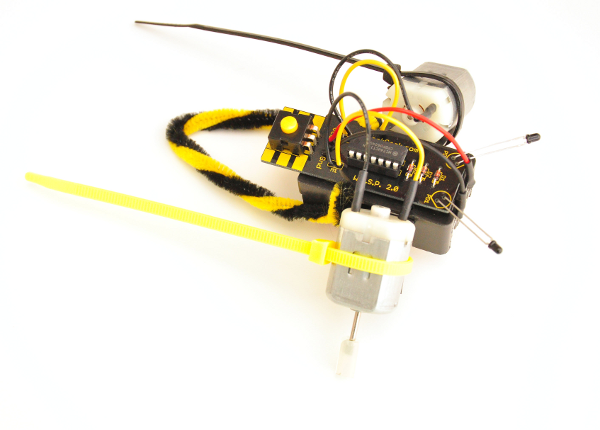
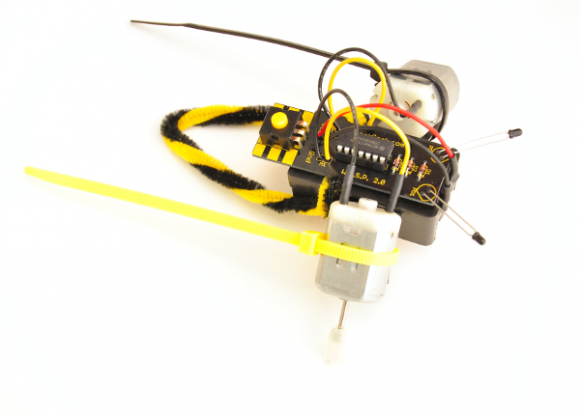
WASP2-0_smallA while back, we released all the manuals for SheekGeek kits like the WASP Original and Black Widow Walker manuals to the public.  We have a newer version of the WASP called the WASP 2.0 and we are releasing the Manual and schematic for it.  We’d love to see what modifications you can make with the new WASP! Feel free to post in the comments.