We’re running out of space. With photos, astrophotography files, and music recordings and work and just life stuff; we are running low on hard drive space. Over the years we’ve bought a few external USB hard drives but even those aren’t manages well and being portable get moved around a lot. That’s not the safest way to handle hard drives. Unless they are SSDs, they can be damaged by moving them around and such. We needed a better solution. I prefer using GUIs to set things up but will for through the terminal if I have to… I just haven’t used my unix fileserver skills since I worked in IT and my linux is a bit rusty as well.
Googling around you’ll find a ton about setting up a NAS or RAID5 or somesuch, but that’s overkill. I’m not looking to spend any money with this, otherwise I’d just have bought yet another portable drive. I already have a bunch of hard drives full of stuff (and honestly, there are a LOT of duplicates of each file taking up tons of space from the crappy way I store my backups). I want to use those drives and be able to clean out the duplicates to gain space. The first step is to build a basic file server.
I had a linux machine (my workhorse during grad school) that wasn’t being used, and bunch of old hard drives that I wanted to use/access It was a variety of drives from old PCs (back to win XP actually, and even older). I had a few external drives that broke so I just plopped them into this machine as well. I didn’t want to format them for a RAID or anything as they were all different sizes and I had data like pics and projects and work stuff from ages ago on them I wanted to keep. The best solution for me was the JBOD (just a bunch of drives) style server. All the NAS examples looked annoying to setup and I’d easily forget what I had done to set them up so JBOD it was. I couldn’t find any single document explaining how to do all the steps I wanted so I spent a couple of weeks failing in my spare time… breaking and unbreaking my linux fileserver and documenting the working parts here for when I need to work on it again. I prefer doing things with GUI if possible, but I’ll do some things using the terminal because you just have to but I tried to keep it to a minimum.
Installing Linux:
If you don’t already have linux running on this computer, I suggest you install it. It sounds hard, but it is super easy to do actually. Just download any flavor of ubuntu you like (lubuntu, kubuntu, linux mint, cinnamon, etc.) I recommend the versions that say “LTS” as those are supported for 2 years or so. There’s a lot of options here.
Install linux without formatting hard drive or losing data:
- Download Wubi. This will let you install linux without killing your windows files or messing anything up. you can always uninstall linux later if you want using this method.
Start clean on either blank hard drive or format an old drive:
- Download ubuntu flavor you prefer
- Format a USB flash drive that’s at least 2GB (lubutnu and xubtunu) or 4GB (all other flavors).
- Use Balena Etcher to burn this ISO file to the USB drive.
- Once finished, you can reboot your computer.
- Enter the boot menu when you see your computer’s startup logo (before windows logo) by pressing either F10, F11, F12, or the delete key. Different manufacturers have different keys they choose for this.
- Select to boot off the USB drive.
- Doubleclick the icon on the desktop to install *buntu. Follow the menus or youtube videos on how to install it.
- Remove the USB drive and reboot when done.
I was already running ubuntu so I just needed to put all the drives in the computer case. I could have 2 drives that were IDE on the same ribbon cable, and 4 SATA drives on the motherboard of my old linux box. Sadly, that’s all this mobo could accommodate. I see spots for 4 more SATA drive on the PCB but they aren’t populated. I filled all 6 spots with drives, making sure that all the drives were set up as slaves except the bootable one (see another post about how I set that up). I also had a TON of USB ports on this motherboard as well (literally 6 on the back, 2 on the front and I added 2 more to a breakout cable inside for a total of 10 USB ports). These can add more portable drives and other drives with some of these awesome USB to IDE/SATA drive cables I have to the server. As I loaded these drives in the bays I made a note as to their serial numbers and capacities. I wrote it on paper, but I also used a sharpie and wrote it on the chassis so I could keep track of what is what and where.
When I turned the machine on, I went into the BIOS and set up the boot order for the hard drives so that my /filesystem always boots first in order of hard drives. When booting the linux machine, hold the Delete key to enter BIOS. Then go to Advanced BIOS Features.

Next select “Hard Disk Priority”. Here’s what that looks like:

Finally, use the arrow keys to select a particular hard drive (the one you want to boot from) and then use the + key to increase its priority until it is number 1:

Once this is done, Hit F10 to save and exit BIOS. It will reboot the machine into linux as it usually did.
Accessing all the Hard Drives:
Open your ubuntu menu and search for the “disks” program. This should be part of gnome-system-tools, which is a standard program in ubuntu. If you don’t have it then open your package manager and search for it. Mark it for installation and click the “Apply” button. or open a terminal and enter the following:
sudo apt-get install gnome-system-tools
You can copy that line of text paste it into the terminal using ctrl+shift+v to paste in a terminal.
All your hard drives should be visible in the Disks app. It lays out all the gory details. Serial numbers, model numbers, etc. Click each drive in the left and note what the “mount point” is for them. I have my Filesystem (this is where I installed the linux operating system) and /home mount points on separate drives. /home is like the user folder in Windows with a folders for Desktop folder, Documents folder, etc. Separating this from the operating system installation file tree allows me to reinstall linux without breaking my user’s documents and settings and Desktop items, etc. I have another post on that and it has served me very well over the years.
For my other drives, they have mount points that start with /mnt and end in a weird code. That code is the UUID (hardware ID) for that hard drive and it isn’t very descriptive for humans. Let’s change that to something helpful. For instance I changed my 1TB drive’s mount point to /mnt/_old_1TB_MyBook

Once all the drives have normal names click the link to one of them and it’ll take you to the folder in your file browser. Go up one directory to see all the hard drives. You’ll note the old folders with the UUIDs in there as well as any old names you had mounted in the past, but they are empty. Only the mount points you named in Disks are connected to your hard drives. You can just delete the other empty old mount points. You have to be root to do so. I used the terminal and the command sudo rmdir <folder name> to delete the ones I was CERTAIN were empty old mount points.
All we’ve done here is essentially modify the /etc/fstab file which contains drive mount info. Lots of other tutorials out there can show you how to do this in the terminal if you want to know how.
Now we need to install all the other software we’ll need for the other steps of setting up the server. in your start menu, search for your package manager software. Mine is “Synaptic package manager” and install the following (make sure you check the box next to these entries, select “Mark for Installation” and when all are selected, click the “Apply” button.) Don’t be surprised if some of these are already selected, just ignore them then:
gnome-system-tools
samba
samba-common
python-glade2
system-config-samba
Or you could open a terminal and paste the following which will install them all for you automatically
sudo apt-get install gnome-system-tools samba samba-common python-glade2 system-config-samba
Once these all install you will create your linux users who can access this machine. You need linux users to be able to create Samba users. Samba is the file server software. From your start menu button, search for the app “Users and Groups.” Add whoever needs users for the fileserver.

Now you can start fiddling with Samba, which is the actual fileserver software. Since there’s no icon to select to load this app, you need to open a terminal (hit ctrl+alt+t) type or paste:
sudo -H system-config-samba
You can copy that line of text paste it into the terminal using ctrl+shift+v to paste in a terminal.
You have to enter your password, but then a window should pop up. The very first time I did this I got the following error:
SystemError: could not open configuration file `/etc/libuser.conf': No such file or directory
ok, so the file doesn’t exist… I’ll simply make a blank file there and try again.
sudo touch /etc/libuser.conf #creates a blank file named libuser.conf in /etc folder
sudo -H system-config-samba
Success! It opened!

Now we need to figure out which folders we want to share and how they are set up in linux.
As we saw before, the internal hard drives all have mount points in the /mnt folder. So let’s create a share for that. Click the big plus sign button and make yours match mine below. Be sure to click the “Access” tab and make it open for everyone.

Do the same kind of thing for the /media folder. This is where any USB storage devices will mount to by default.
And finally, I have a TON of files on my old desktop and user folder, so I want to make the entire /home folder accessible as well. You have to be careful with this though because if you allow all users (and even guests) edit access to your home folder, they can delete stuff, and snoop to their hearts’ content. Any sensitive data should be locked so that users are required to log in and can only access their files. If for example you wanted each linux user we created earlier to access only their home folders, you’d set that up as /home/adam then you could set the access rights to only allow user “adam” to view it.
Once you’ve set this up, now you must create the Samba users. While in the same application, select Preferences –> Samba users. Here you will add a new user with the same name as each linux user. You will select each user from the “Unix user” dropdown box (this is why we had to create all the users before). You can have the same or different passwords than your linux login. Once you added everyone, close this app. The steps we just took replace the manual process of editing a configuration file for Samba. This is a plain text file stores in /etc/samba called smb.conf and this is usually what most tutorials will do, show you how to edit this file manually. I didn’t have luck with that. Also, you might see tutorials using a tool called gadmin-samba however when I used that it completely hosed up my system hardcore. I had to purge all samba stuff, delete all the files and start from scratch several times to fix the issues.
File/Folder Access Rights:
The final step here that is required is to set the access rights of each folder you want to share. This is important because unless we change these permissions, we will end up only being able to VIEW files and folders on the server but we can’t create new files, paste, move, or delete anything yet. To fix this we need to change the permissions on the folders we set up to share.
We need to open the folders as root or administrator. Depending on the file manager software you might have different ways to do this, but in mine you simple right click ANY folder and choose “open as Administrator” or “Open as root” then I can simply navigate to the filepath “/” If yours doesn’t offer this, then open a terminal and type in the name of your file manager but call it from sudo like one of the following lines:
sudo nautilus /
#or
sudo nemo /
#or
sudo caja /
Right click on the folder of interest, for example “/mnt” and view the Properties. Click the Permissions” tab and make sure that they all show the ability to “Create and delete files.”
But if you’re using the terminal anyway, you can simply use the chmod commands. Here’s the best explanation of how to use it I’ve ever seen. You can make /mnt and /media fully writable like this:
sudo chmod 777 –R /mnt
sudo chmod 777 –R /media
Or you can give others the ability to look at files in your home user folder, but not create or delete like this:
sudo chmod 755 –R /home/adam
And you can block others from your folders and have them only viewable and editable by you like so:
sudo chmod 700 –R /home/adam
On the Windows machine:
Now your fileserver is set up you need to access it. Go on your windows machine and open a file browser window. Right-click on “This PC” and select “Add a Network Location” Click Next until it asks for the location. Click “Browse” and wait a minute for it to search your network. You should see your fileServer’s name pop up in the list. Click literally any folder under the fileServer and select Next.

Shorten the terribly long name it gives you (I just delete the highlighted part) and you’re done.

It’ll pull in the other accessible folders on that drive as well. Now you should be able to access and edit anything on those folders on the fileserver. To get to this again simply choose the fileserver option in the left-pane of the windows file explorer. If this doesn’t appear, then make sure your server is turned on and is on the same network as your windows machine and repeat the instruction in this section of the post.

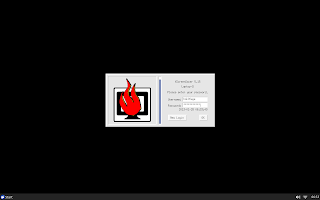
The first time you visit something in here it might ask you for a username and password. Just enter one of the Samba username and password combos we created earlier. You can make it save these credentials and never ask you again if you’d like.
Cherry on top – Remote Shutdown of server:
If you don’t want to connect a keyboard, mouse and monitor to the screen just to shutdown the fileserver, you can do so remotely by installing and using SSH. SSH is a way to securely tunnel into the fileserver’s terminal remotely. That way you can send it the standard linux shutdown message from your windows PC when you are done with it for the day.
Open synaptic and you should select the following:
or run the following command:
sudo systemctl status ssh
This will install the needed files for SSH. Next, we need to let the firewall built into linux know you want to allow ssh. In a terminal window run the following:
sudo ufw allow ssh
Now you can go to the windows computer and use putty.

Enter your data here (keep the port as 22) and when you click “open” a black command window will pop up asking you who you want to login as. Type your linux username and hit enter and it’ll ask for a password. Now you’re commanding the terminal of the linux machine from windows. You can do literally anything the terminal can handle. You can’t do anything that requires GUIs though this way. That’s fine though because this is enough to send the reboot or shutdown signal. The shutdown takes about a minute before it actually shuts down, so don’ t think it isn’t doing anything, just give it some time.
sudo shutdown
#or
sudo reboot
Remote Desktop:
If you want a graphical environment for controlling your server, there’s 2 options. One is to simply remote Desktop into it. There are many ways to do this, but the easiest is to simply install and enable the xrdp app on the linux machine and use the built-in RDP app in windows to connect.
Open synaptic package manager and search for xrdp and xorgxrdp. Mark it for installation and click Apply.
Once this is done, go to the in the App search, look for “System Settings”
Go to Sharing and make sure Remote Login is ON.

Next, in system settings, click “Network” in the left column and then click the gear button next to your wired (or wireless) connection. This will give you your IP address. It should look similar to your router’s address. Mine’s 192.168.x.x. You’ll need this to connect in windows.
To do all this in the terminal on the linux machine (or through SSH) run the following:
sudo apt install xrdp
sudo systemctl enable xrdp
ifconfig
This last command, ifconfig, will give you a screen showing you the local IP address of the machine. It should match closely to your router’s address. Mine is 192.168.x.x so I look for something that matches that. You’ll use this on the windows machine.
Now on the windows machine, click the start button and type “RDP” and hit enter. Type in the IP address of the linux machine.
I found an easier way. Simply right click on the fileserver in your explorer folder and select “Remote into this machine”

When you click connect, you’ll be able to login. I had a little trouble with this connecting. I tried all the selections in the dropdown menu a couple of times and on the 2nd or 3rd try it worked. Once I was logged in I got an error asking me to login to create a color device over and over. After entering my password 3 times I just canceled it and the window stopped popping up. I haven’t done this in like 15 years, but I don’t remember the experience being so crappy. I can access the desktop, but it is displaying a GNOME environment instead of the Mate environment I have installed on the linux machine. Nonetheless I can get do things graphically without issue.
Other Thoughts:
The way I’ve done it is quite insecure. I’m allowing Guests on the network access to create and destroy all the shared files which is kind of dumb… I’ll live with it though because I will only turn this fileserver on if I am immediately accessing the files on it, then immediately turning it off again. In that short time I hope I don’t get hacked…
Storing all your files in one location is not the best for preservation. You can make a personal cloud like Google Drive, Dropbox, Box, OneDrive, Apple Cloud, etc. by using the Unison program. It essentially synchronized two folders. These can be on the same computer, one on a portable USB drive, or even across the network. Anything added, modified, or deleted in one folder is automatically synched to the other in both directions.
Windows Networks Issues:
If the network disappeared from the “Networks” thing in Windows 10 but still somehow appears in the sidebar and is still accessible, no prob. Follow these instructions: https://www.wintips.org/fix-windows-10-network-computers-not-showing/#method-5
File Manager Share plugins:
Previously, I had some luck with using my file-brower’s “share” plugin. Nautilus, Nemo, and Caja all have their respective “share” app you can install in apt-get or synaptic eg “caja-share“. This will allow you to simply right-click on a folder and select “share settings” where you can set this up yourself. The problem with this is that this info is NOT stored in the basic /etc/samba/smb.conf configuration file. In fact, it is nowhere to be found anywhere in that folder. This is because this plugin stores this info in the following path:
/var/lib/samba/usershares
To create the Samba users and set up their SAMBA passwords (these can and maybe *should* be different than their linux user passwords)
sudo smbpasswd –a user1
sudo smbpasswd –a user2
Now enable the users
sudo smbpasswd –e user1
sudo smbpasswd –e user2
Check the status of the samba server. You should see “active” somewhere. If not, you hosed it somehow. Tips on how to fix this at the end…
sudo systemctl status smbd
Restarting samba (after every big change to users, folders, etc you should do this. Or you can reboot the machine, which is foolproof method of restarting the server the right way)
sudo systemctl restart smbd
sudo systemctl restart nmbd
or do it directly for smbd and nbmd
sudo smbd stop
sudo nmbd stop
sudo smbd start
sudo nmbd start