
 For the longest time, we’ve wanted some kind of light above the sink in our kitchen. We finally settled on a simple DIY solution to this problem using the IKEA Hemma cord set. The cord set comes with a long electrical wire that has a normal 2-prong plug on one end, and a light socket on the other. The light socket has a removable screw piece to allow you to attach a lamp shade. The screw piece holds the shade securely onto the light socket end of the cord. The cord itself is quite strong and can easily handle a glass shade hanging from it.
The cord set comes with an open eye hook, but it didn’t work in our situation because there was no stud in the ceiling where we wanted to hang the light. We ended up buying a hanging plant hook kit. We had to modify the hook slightly because the plastic wire hanger that came with the Hemma was too small to fit over the end of the planter hook.

To fix this, I simply cut the end off of the hook with a small hacksaw. The metal was very soft and this took only seconds. If you don’t have a hacksaw, you could possibly use heavy duty wire cutters to cut the end off.

These hanging kits are designed to hold hanging planters which are pretty heavy and come with the parts to install on either a stud or directly into drywall. The drywall anchor is a spring toggle bolt, which is capable of hanging a lot of weight. This is a bit overkill for this project, but it doesn’t hurt. For other projects, you may want to check out which kind of drywall anchor would be right for you. To install this toggle bolt, I used a half-inch spade drill bit to drill a hole in the ceiling large enough to accept the toggle bolt when it is folded.

Once the hole has been drilled, simply insert the toggle bolt and screw the hook until it is tight against the ceiling.
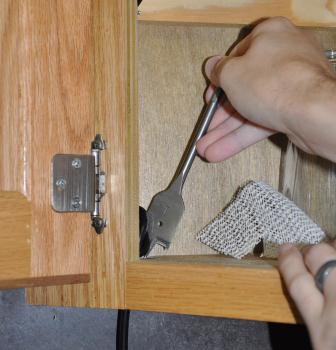
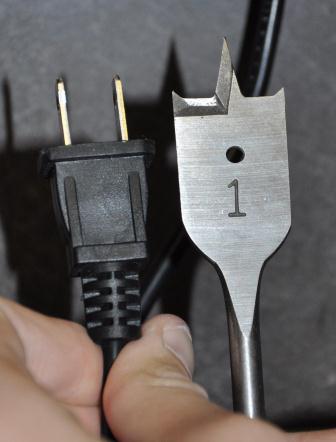
We planned to power the light using a power socket under the kitchen cabinets by the sink but we didn’t want the plug just hanging down from the ceiling for two reasons; 1) Because it is unsightly and 2) because the Hemma wire was several feet too long. What we decided to do was to run the wire inside our cabinets and leave the extra wire on top of the cabinet. To do this, we used a larger drill bit to drill a hole bottom shelf and the top of the cabinets as close to the back corner as possible.

A 1-inch spade drill bit which was just wide enough to handle the plug.

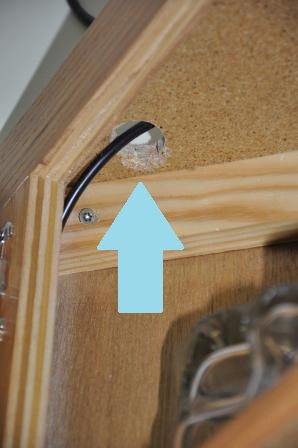
We threaded the wire through the holes and tied a knot just before the bottom hole leaving enough on the other side to reach the plug under the cabinets. This knot should prevent any extra wire from coming through the hole.

To keep the wire out of the way and tidy inside the cabinet, we used small nails to tack it to the back side of the cabinet facing. This also help rout the wire neatly around the inner shelves.

We got a shade from a local Habitat for Humanity ReStore for $2.00. These stores are great because they have a wide variety of random construction pieces and furniture for great prices and the money goes to help Habitat for Humanity. The particular share we got was a bit too big to fit on the screw part of the hemma, so I filed down some of the plastic on the hemma’s light socket to make some room. I was only able to thread a couple of threads on the socket with the screw piece, but that was plenty to hold the shade.
All in all, the IKEA Hemma proved to be a great solution for us. There are tons of really great examples out there using it as well. It allows you to be creative and still coming up with a professional look. If you have used the Hemma for a DIY lighting project, we’d love to see what you did! Leave us a comment with info and a link.


